How to Decorate Above Your Sofa: 16 Inspiring Ideas
But the way pictures are arranged on a wall can be more important than the actual pictures themselves - a badly arranged display will negatively impact the viewer's ability to appreciate the art.
To ensure a cohesive design, size, shape, and color scheme must all be taken into consideration, and you also need to ensure that the frames and images work with each other.
To help, we've compiled some ideas that will assist you in creating a the perfect artwork or picture display in your home and help you to avoid any design issues.
Arranging Pictures on a Wall: Your Options
While arranging art on a wall can be a daunting task, there is no need to call in an interior designer - you can definitely do it yourself!
We've compiled some tips and tricks below to give you some inspiration for your next picture wall - whether you opt for a single focal piece or a stylish gallery wall, we've got you covered.
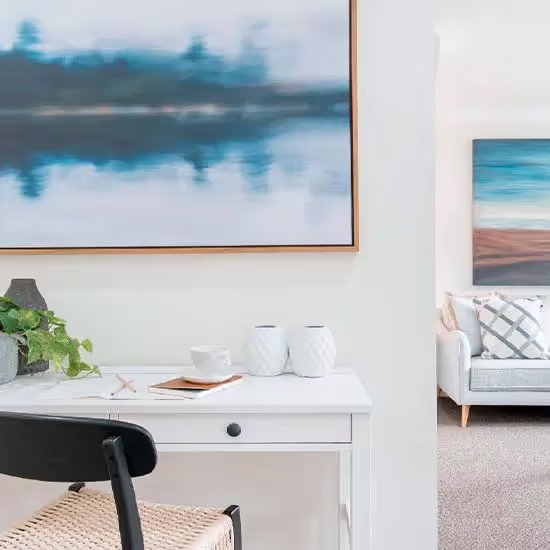
Create a Focal Point

When you're designing a gallery wall or want to hang a number of pictures on the same wall, it is important to choose which piece is going to be the prime focus, so that you can easily decide on how to arrange the other pieces around it.
It is important to have a common theme throughout the prints or artworks. The easiest way to do this is to have a common color in each piece.
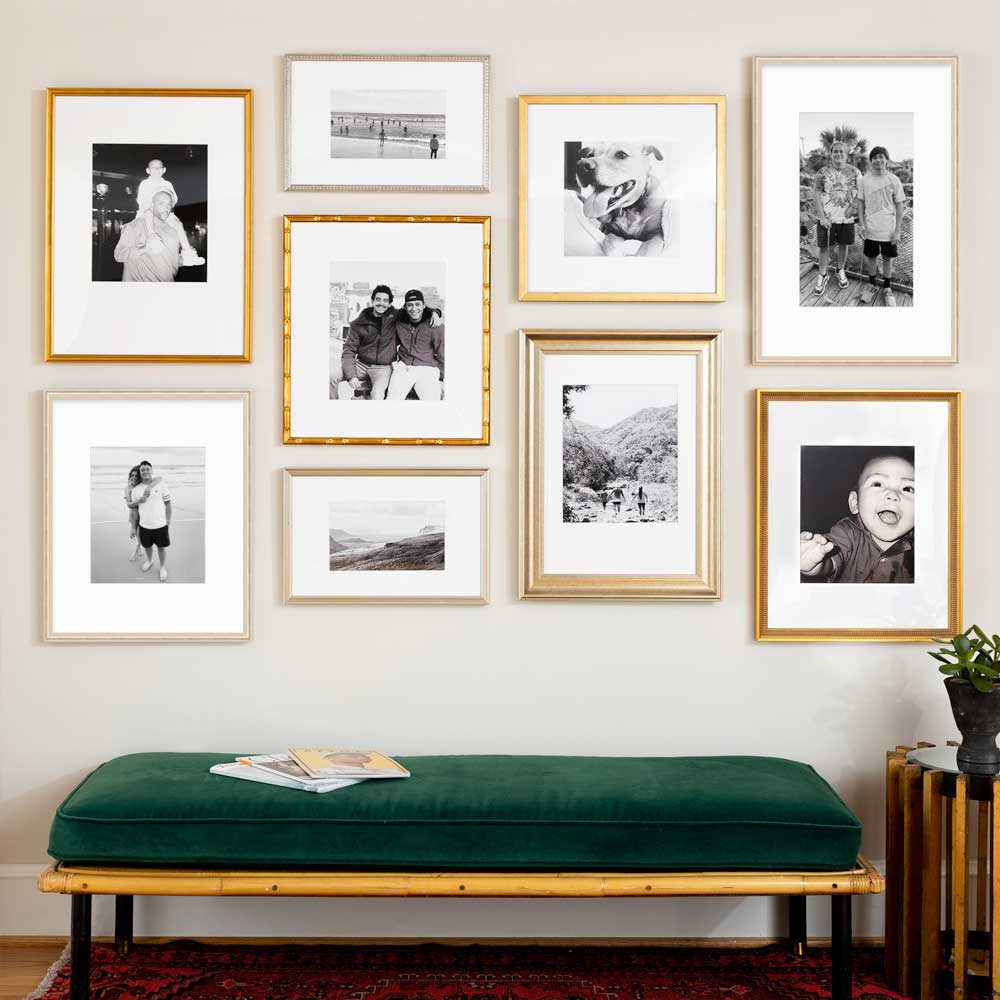
Create a Grid
For a minimalist, highly ordered home, arranging your gallery wall in a grid format will be a good choice. As Framebridge's Kacey Embry states, "If you lean towards a more organized style, a grid arrangement is going to be the perfect fit. Using consistent photo and frame sizes has a very classic and polished look that will stand the test of time."
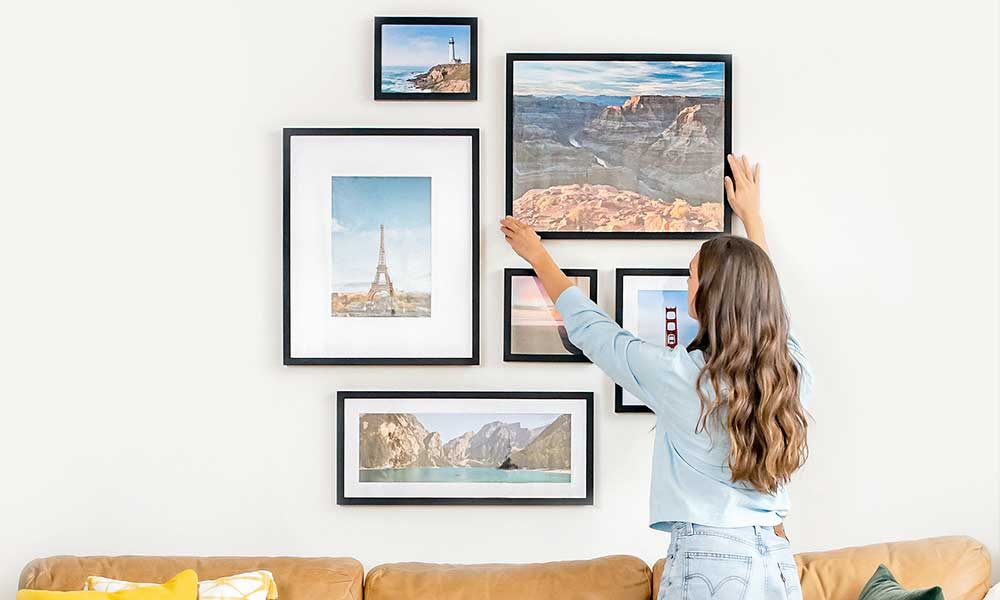
Utilize the Space Behind the Sofa
If you're not sure what to do with the big open wall above the sofa, a gallery wall is a great decor option. Not only is it a great utilization of space, but it also gives the area a cozy feel. Bringing the color of the sofa into the gallery wall, either in the prints or through the frames, will really bring the look together
When arranging artwork begind a sofa, a good rule of thumb is that the art (whether its a central large picture or a serveral small pictures to make a gallery wall) should be at least two thirds as wide as the furniture itself.

Pro Tip: Don't Hang Photos Too High
Hanging pictures, whether single or multiple frames, high up on the wall is a common mistake that homeowners make when decorating.
"You want the center of the overall arrangement to be around eye-level, so roughly 57 inches from the floor on a blank wall, or 7 - 10 inches above the furniture if you're hanging the frames over a console or sofa," advises Kacey Embry.
Arrange Pictures on a Ledge
Adding a shelf or a ledge to your arrangement can create an additional point of interest and can also elevate the design by creating different levels. You can place some of the artworks on the shelf and possibly include a different art piece, such as a small statue or add a plant.
You can also take advantage of surfaces on top of furniture pieces like tall bookcases to add some artwork.
Try a Cork Board
If you don't want to hang multiple individual frames or prints, a corkboard is a great alternative. You can hang the corkboard on the wall and pin various artworks and designs onto it to create a collage.
This is also a great option for renters - you can have the look of a gallery wall without having multiple holes to fill when you move.
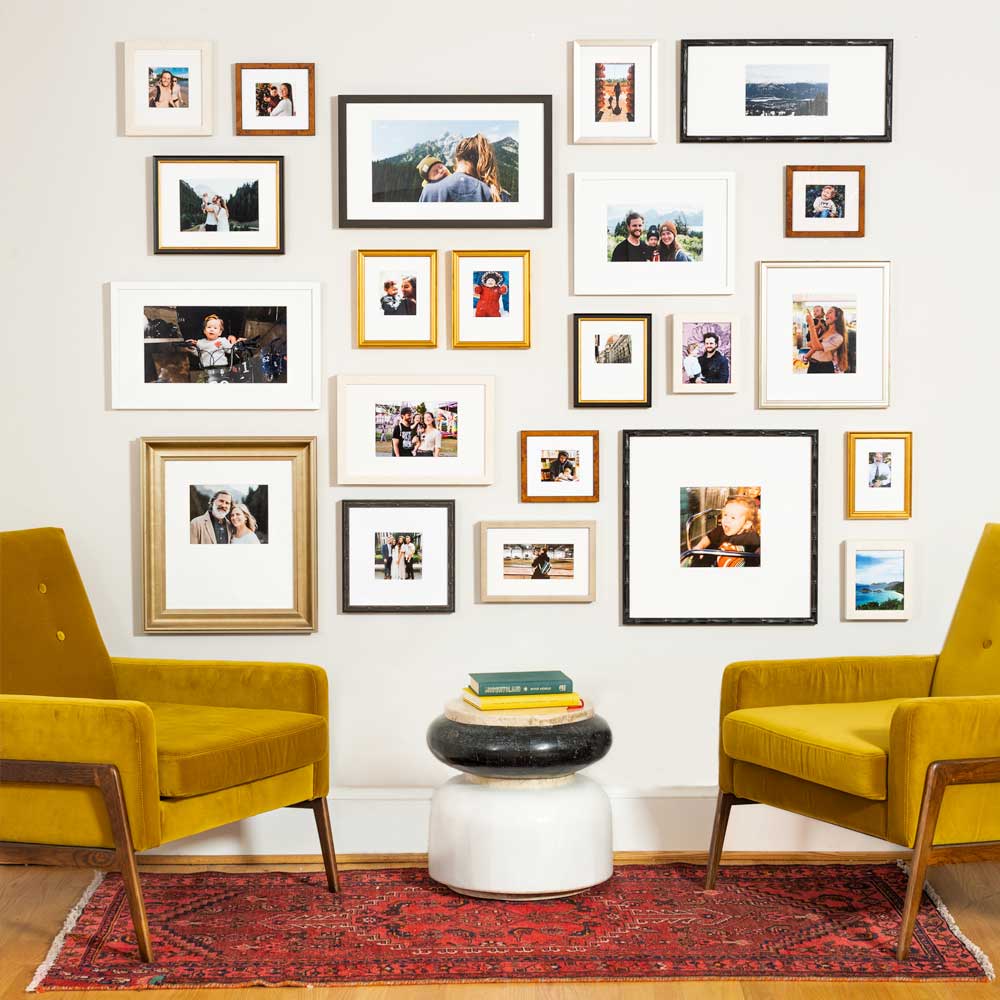
Make an Impact in the Hallway
The hallway is a space that is often forgotten or neglected when it comes to wall art. Adding decor to this frequently used space can improve the mood of the home and can make the space feel bigger if arranged carefully. Use different sizes and colors to tell a story along the wall and elongate the space.
Kacey Embry suggests having an organic and free-flowing design if you are inclined towards the eclectic or maximalist style of decor. "The variety in photo sizes and frame styles will generally have a more casual, collected feel," she states, adding that using metallic frames will elevate the style to fit well in a formal space.
What Are the Dos and Don'ts of a Picture Wall?
There are some key tips that need to be followed to create your gallery walls successfully. Creating a layout is vital, as well as making sure that the colors of the art pieces work with the rest of the colors in the room. It is also important that the wall reflects your personality and personal style.
Don't Forget to Plan Your Layout Beforehand
An absolute must when it comes to gallery wall art is planning the layout before hanging any pictures. You don't want to create unnecessary holes in the wall, and you also want to avoid a wall design that is unbalanced.
Christina Capetola, the Head Designer at Keepsake, advises that you "tailor your gallery wall to the space" and that you "consider larger frames, so the frames feel balanced in the room" when creating a gallery wall design on large wall space.
Some pertinent advice from Kacey Embry is to lay your frames on the floor, creating your ideal arrangement by changing the picture placement until you reach a design you're happy with. This will make the process of hanging pictures much easier and remove the stress that comes with placing pictures incorrectly.
Do Hang the Largest Picture First
Large pictures will most likely be your main focal point and will have a big effect on the rest of the layout. It's important to hang them on the wall first before hanging the smaller pictures.
"Grab a level, so your frames are straight!" says Capetola. Not only will using a level make the process much easier, but it will also ensure that the arrangement is pleasing to the eye. This design guru also recommends leaving 2 inches of space between each picture when hanging them.
"Once you've started hanging the frames, step back occasionally to get an overview of your progress. It's much easier to make small adjustments as you go."
Kacey Embry gives some great advice on how to make sure you're getting everything neat and level: "Once you've started hanging the frames, step back occasionally to get an overview of your progress. It's much easier to make small adjustments as you go." We advise checking after every 1 - 2 pictures to prevent too much adjustment later on.
Don't Overlook Your Wall Colour
The color of your wall is an important design aspect to consider when deciding on your pictures and their frames. You'll want to make sure that the designs and colors of your framed pictures don't clash with the wall space or the furniture nearby.
Capetola suggests using complementary colors that will enhance the pre-existing room design as well as the chosen artworks.
Do Follow the Rule of Three
The rule of three makes the task of choosing multiple pictures for your space much easier. By choosing three colors, textures, or subjects, you can easily compile your family photos or framed prints into a cohesive collection of art.
This also works well for choosing frames - if you have a somewhat eclectic selection of pictures, utilizing the same three colors and textures for the frames can bring the selection together pleasingly.
Don't Go Overboard
While it can be tempting to display all the family photos on one wall in the family room, this can result in a wall that is too busy. This can end up distracting attention from the most important prints. White space is not a bad thing and can provide visual balance to the arrangement - less can be more, especially when it comes to home decor.
You don't need to complete your picture arrangement all at once - you can add smaller pictures or larger pictures slowly over time
A helpful suggestion from Capetola is to start hanging just a few frames and not be intimidated by the blank wall. You don't need to complete your picture arrangement all at once - you can add smaller pictures or larger pictures slowly over time. Using identical frames for any additional pictures can help you to keep the design cohesive.
While acknowledging that picture hanging can be a daunting task, Kacey Embry encourages you not to get overwhelmed. An easy way to avoid overwhelm is to have a plan and lay out any tools and hanging hardware you may need before you start.
Do Lean Into Your Personality
Your home is an extension of yourself, and so the way that you decorate it needs to be a representation of your style and personality. You don't need to be an interior designer in order to create a beautiful home.
Choosing and hanging art is an art in itself, but it is also very subjective. Kacey Embry reminds us that "the most important thing is that you choose and display the photos in a way that reflects who you are, your experiences, and personal style."
You'll want to make sure that you have a wall covered with art and prints that bring you joy and that you have a connection with, as they'll be something you look at every day.